Gift Giving Friday VIII
DISCLAIMER: you should dye the yarn in a pot that you don't cook in because you don't know for sure how the yarn was or wasn't cleaned before it got to you.
You will need yarn (a protein fiber: wool, silk, alpaca - anything that comes from an animal. Cotton is not an animal), some Wilton's Icing Colors in the color(s) you plan to use, white vinegar, water, a small plastic container with a waterproof lid (optional), toothpicks, and a pot large enough for the yarn to move about freely.

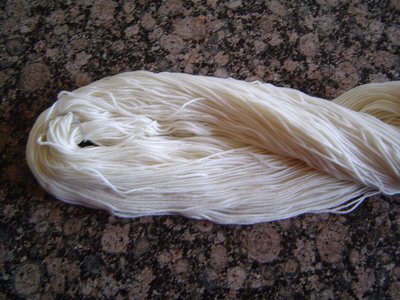
Your yarn will need to be in a skein, rather than a ball. If its in a ball, wrap it around the back of a chair or a niddy noddy if you have one, then tie it in 3 or 4 places LOOSELY with a scrap of yarn to keep it intact while you dye it. If its already skeined, make sure the ties are loose enough that the dye can get to the yarn under the ties and you might want to add another tie or two depending on how many it already has. I am using the KnitPicks Dye Your Own in the sock/fingering weight.
Next you should put enough water into the pot so that it will cover the yarn. Add a couple of "glugs" of vinegar, then add a little more just to be sure. (Yes, this is a highly scientific and exact dying process) Set the pot aside for now.

Put some water into the plastic container*. With a toothpick, scoop out some of the Wilton's Icing Colors. I used Teal with a little bit of Juniper Green to darken and tone down the Teal. (If you are ever trying to dye yarn a camo color, use the Juniper Green - it is an olive green that breaks into brown spots) I wanted the Teal to be a little less blue and a little more green than it is straight out of the bottle, and I could have used Yellow for this, but I also wanted to tone down the color some so it was a little dusty and not as bright. The brown in the Juniper Green has some red in it, which is the complement of green, so it mutes the green a little. (This is where a color wheel or a book on color theory comes in handy) As you can see, I used a lot more Teal (on the left) than I did Juniper Green. Wipe the toothpicks off in the water and on the sides of the plastic container. Put the lid on the container and shake it until the Wilton's dissolves into the water.

Add the dye from the container into the pot of vinegar and water, stir a little. Toss the yarn into the pot and put the whole thing on the stove. You want to cook the pot at Low heat, keeping it just under a simmer. A simmer could cause felting, depending on your yarn, so keep it just a little cooler. Periodically move the yarn around the pot very carefully and gently to get the color spread througout the skein - stirring too much can cause felting.

Cook the pot of yarn until the water is clear (this means your dye is exhausted). If the yarn is too light or the color needs to be adjusted, add more dye. I added more dye, in the same proportions, one more time, to get the yarn as dark as I wanted. Once you're happy with the color of the yarn and the water is clear, cook an additional 30-45 minutes to set the color. Drain the water, let the yarn cool and wash it. TA DA! Hand dyed yarn for your knitting buddies!
 *If you want more spots of color and you want the color to break, skip this mixing step. Just plop the dye blobs into the water and vinegar pot.


0 Comments:
Post a Comment
<< Home