And Now For Something Completely Different...
Remember the fabric from Friday's post? Want to know what it became? OK, I'll not only show you the finished project, but also tell you how to make it! First though, I'm going to introduce my assistant for this project, and to the best of my knowledge, she's never been on the blog (although Max helped also, but you've already met him).
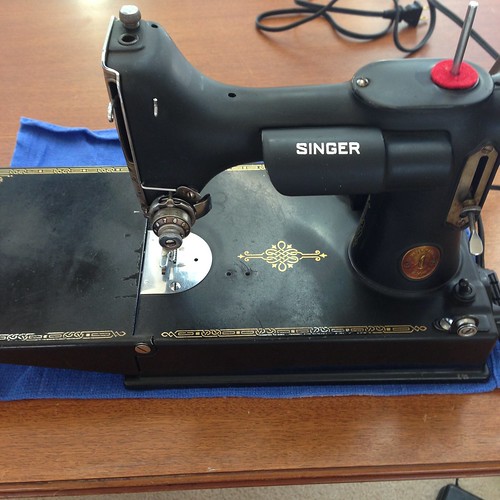 This is Elizabeth, my Singer 221, AKA the Singer Featherweight. She is from 1939 and has the scrolled face plate.
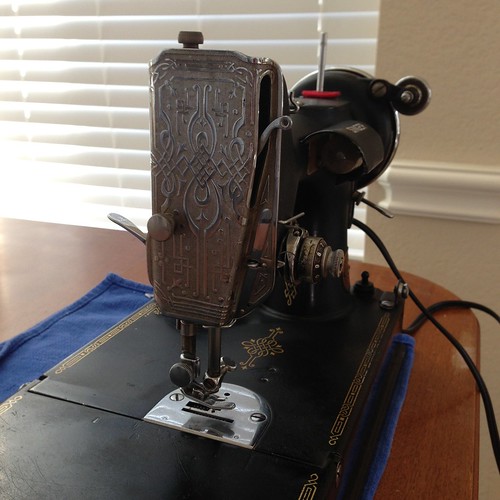 Later models had a simpler, striated faceplate. I got her about 15 years ago, but she hasn't done very much in a while. I'm not sure if Caleb even saw her before this project. She's just been quietly sitting in her case, waiting for me to use her. The first thing I did was clean her up and oil her really well. There are a couple of things that need to be replaced (her belt is cracking and will probably break any day, the handle on the case is falling to bits - literally, and her oil pad is just nasty), so as I was going over her I made a list and have ordered the parts she needs. Thankfully, these weren't necessary immediately, so I was able to use her for this project. She'd like to apologize for the blue towel under her, but she's missing a rubber foot and so she's got a bit of a wobble and will scratch the table without the foot or towel. (I ordered some new feet cushions too.)
For those of you unfamiliar with the Featherweight, it is a small, straight stitch machine, made by Singer from 1933 until 1961 (black machines). They later came in white and beige, but the whites are sometimes called green featherweights because there was copper in the paint and it changed color over time. The machine was made of aluminum, which makes it much lighter than a cast iron machine, it was smaller than a full sized machine and made to be portable. Like I said, they only do a straight stitch, they go forward and backwards, and take needles and bobbins that are still produced today. They are very popular with quilters and for piecing they work great. There is also a Singer 222, which is the Free Arm Featherweight and you can drop the feed dogs on that model, but it is mostly agreed that doing free motion quilting on a Featherweight is a great way to burn out the motor. The 222 Featherweights are much more rare than the 221's and are priced accordingly.
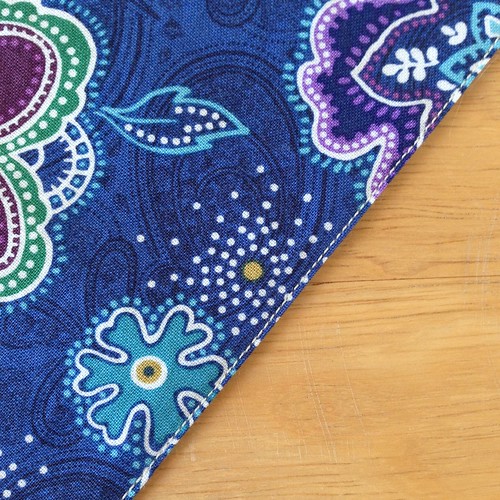
So, what was our project? Napkins! We've gotten back to using cloth napkins around here and they were looking a little sad. Also, it kind of defeats the purpose of using cloth napkins if you only have a few and are running extra washing machine loads to clean them. I went stash diving and found fabric for three new sets of six napkins. We have three people in our house and the kitchen table seats six. I made the napkins 17 1/2 inch square (that was pure, lazy math on my part). For everyday napkins you want them to be about 16-18 inches square, but if you're doing formal napkins, you'd want 20-21 inch square napkins. These are lined napkins because I used printed fabrics. If you're using solid fabrics, woven plaids, or even batiks you wouldn't necessarily need to line them because they're the same on both sides - you could just hem them if you wanted to. I also mostly used cotton quilting fabrics. The lining for the bumble bee napkins is cotton/poly gingham because it was so cute. I don't like using blends because they don't stick to 100% cotton. Cotton sticks to cotton and will actually work with you when you're sewing it, so if you're buying fabrics for napkins, I'd suggest getting all cotton.
What you'll need:
For those of you unfamiliar with the Featherweight, it is a small, straight stitch machine, made by Singer from 1933 until 1961 (black machines). They later came in white and beige, but the whites are sometimes called green featherweights because there was copper in the paint and it changed color over time. The machine was made of aluminum, which makes it much lighter than a cast iron machine, it was smaller than a full sized machine and made to be portable. Like I said, they only do a straight stitch, they go forward and backwards, and take needles and bobbins that are still produced today. They are very popular with quilters and for piecing they work great. There is also a Singer 222, which is the Free Arm Featherweight and you can drop the feed dogs on that model, but it is mostly agreed that doing free motion quilting on a Featherweight is a great way to burn out the motor. The 222 Featherweights are much more rare than the 221's and are priced accordingly.
So, what was our project? Napkins! We've gotten back to using cloth napkins around here and they were looking a little sad. Also, it kind of defeats the purpose of using cloth napkins if you only have a few and are running extra washing machine loads to clean them. I went stash diving and found fabric for three new sets of six napkins. We have three people in our house and the kitchen table seats six. I made the napkins 17 1/2 inch square (that was pure, lazy math on my part). For everyday napkins you want them to be about 16-18 inches square, but if you're doing formal napkins, you'd want 20-21 inch square napkins. These are lined napkins because I used printed fabrics. If you're using solid fabrics, woven plaids, or even batiks you wouldn't necessarily need to line them because they're the same on both sides - you could just hem them if you wanted to. I also mostly used cotton quilting fabrics. The lining for the bumble bee napkins is cotton/poly gingham because it was so cute. I don't like using blends because they don't stick to 100% cotton. Cotton sticks to cotton and will actually work with you when you're sewing it, so if you're buying fabrics for napkins, I'd suggest getting all cotton.
What you'll need:
- Quilting cotton - you'll need 1/2 yard for every two napkins you make, but add in an extra 1/8 to the total just to give yourself a little wiggle room for cutting. (6 napkins = 1-1/2 yards + 1/8 = 1-5/8 yards) You'll need the same amount for lining. (For the 6 napkin example- 1-5/8 yards of main fabric and 1-5/8 yards of lining fabric.) Both fabrics will show as you use the napkin so feel free to use something cute for the lining as well as the main fabric.
- Sewing machine - All you NEED is a straight stitch.
- Thread - I went with an offwhite cotton for all three sets. You could coordinate your thread to your fabrics, but a neutral works also. I usually use cotton thread with cotton fabrics but this is my quilting background.
- Sewing machine needle. Use a Microtex Sharp size 80/12, or a Quilting 75/11 for quilting cotton. You could use a Universal if that's what you've got, but the topstitching looks neater with a sharp or quilting needle. Start with a fresh needle. Most of us don't change our needles often enough - you should change needles whenever you begin a new project.
- Point turner - a chopstick or large diameter knitting needle will work for this in a pinch.
- Iron
- Something to cut with. I used my rotary cutter to do the cutting. You could use scissors if you don't have a rotary cutter and mat.
Directions:
- Prewash and dry your fabric the same way you're planning on treating the napkins. At my house this is hot water and extra scrubby with medium dry. (The washing machine calls it towels or something, you get the point.) I'm guessing this is what most of us would use, except for those people with white carpets who wear white clothes all the time and have non shedding white pets and serve only colorless liquids and foods that don't spill. Unfortunately, most of us don't have unicorns doing our laundry.
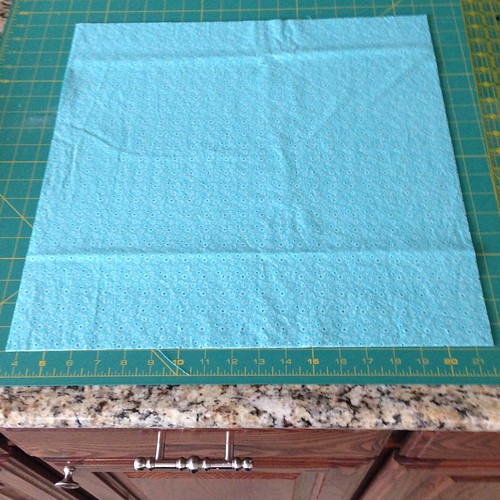
- You could press the fabrics at this point. If they're extra wrinkly you definitely should. Mine came out of the dryer reasonably flat and I was feeling lazy, so I didn't. The cutting will be more precise if you press them but these are napkins, not NASA. If I was making napkins as gifts, I would have pressed them.
- Cut your fabric into 18 inch squares. Again, I used a rotary cutter to do this. You'll need one square of main fabric and one square of lining for each napkin. If you really want to be efficient, you could layer your two fabrics right sides together and then cut them. That would be impressive. Keep an eye out for small children and pets who are under the impression they're "helpful." Rotary cutters are sharp enough to take off fingers.
- Go to the sewing machine. Change the needle if you haven't already and thread it. Double check your tension on a scrap of fabric left from your cutting. If you don't know what correct tension looks like, check your sewing machine manual or google it. Don't be afraid of adjusting this. It's not scary and it's something everyone should be comfortable with on their sewing machine.
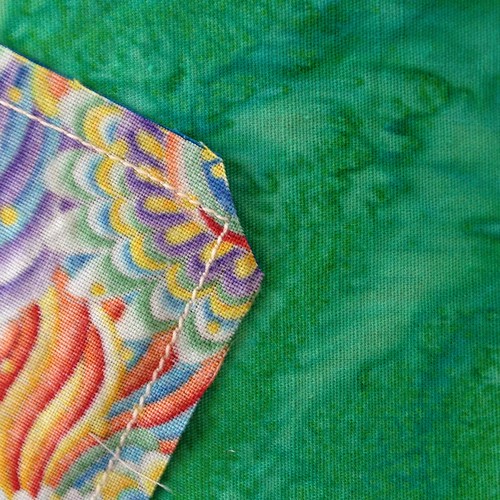
- Place one main napkin square and one lining napkin square right sides together. Using a 1/4 inch seamline start sewing about 2/3 of the way down one side. If you don't have a 1/4 inch foot, just use the edge of your foot. Even if it's a little bigger than a 1/4 inch, it won't matter as long as you're consistent. Backstitch the first couple of stitches to lock it, go all the way around the square, stopping about 4-5 inches before the start - leaving a gap for turning. You don't need a tiny gap here - the napkin is big enough you can make this easy on yourself. Just make sure you sew past the corners and leave enough of an opening to get your hand through easily. I didn't measure this, I just eyeballed it. Do all the napkins like this.
- Clip the corners. This makes the napkin corners easier to turn right side out. Don't clip the stitching, just get close.
- Turn the napkins right side out. Use a point turner or chopstick or large diameter knitting needle to make the corners nice and pointy. Be careful here. If you're too enthusiastic you could go right through the corner.
- Press the napkins. Roll the seamlines to the edge a little bit at a time as you press them. You're just making sure the seams are at the edge of the napkins here. I worked a couple of inches at a time and just kept my fingers a little ahead of the point of the iron. Be careful. Irons and fingers aren't a good mix, but you can get the iron pretty close to your fingers without burning yourself as long as you pay attention. When you get to the side with the opening, fold the open edges in on both the lining and the main fabric and press so you have a straight edge between the beginning and end of the sewing.
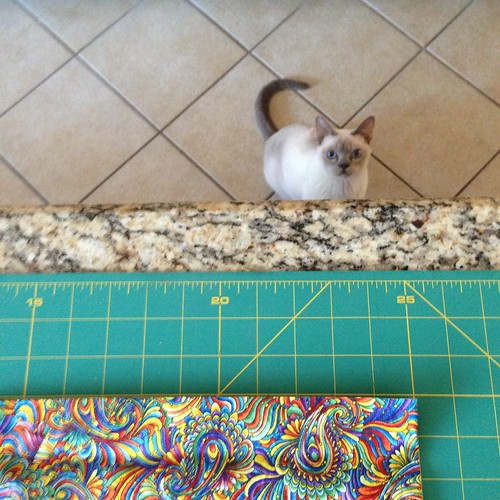
- Do this with all the napkins. If you're lucky at this point the cat will come into to do a quality inspection and upon finding a pile of freshly pressed, warm napkins will joyously roll and purr upon them. This means you are doing a good job. Unfortunately, the camera was downstairs so I could not document the rolling purr of quality napkins. Just be aware that there was much purring and the tiny gray feet were in the air in kitty bliss. Also, happy wiggles.
- Go back to the sewing machine and sew all the way around all four sides of the napkin to finish it. At the end, make sure you sew a few stitches over the start to lock the stitching. This stitching not only gives a nice edge, but also closes the gap from the turning. You want to sew as close to the edge as you can and since this is visible topstitching, you want to sew as straight as you can. Pick a place on your foot or the bed of the machine to line up the edge of the napkin and watch this part. Do not watch the needle - amazingly, it will go up and down as long as you are pressing on the foot control. Just watch the line you've picked and the edge of your napkin. This is where using a sharp needle (Microtex or Quilting are both "sharp" types) will pay off - Universal's aren't made to pierce the yarns of the fabric - they shift the yarns to the right or left as they sew. This is nice for knits, but can make your topstitching look wonky. I prefer to use a Sharp because that way the topstitching goes in a straight line. If I'm sewing knits, I use a Ball Point. In my opinion, Universals are OK for everything but not really great for anything. The specialized needles are there for a reason.
- Now fold and admire your nice pile of new napkins!
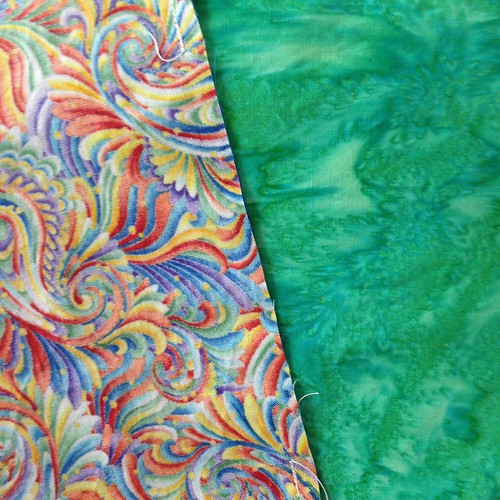
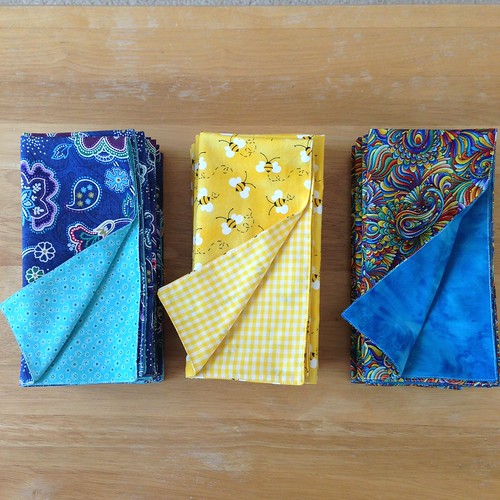
If you are using a machine that does more than a straight stitch, you could use a decorative stitch for the final top stitching instead of a straight stitch. I do recommend using fabrics with patterns on them. Napkins get used and get food wiped on them. Some foods stain (the bumble bees are totally NOT for spaghetti night), prints will help hide the stains. I'm thinking that rainbow swirl fabric on the right could probably handle an entire lasagna wiped on it with no problem. This project is really easy to do and could make nice gifts if you coordinate the fabrics to someone's kitchen colors. I used the same color thread for all three sets of napkins so I just sewed them assembly line style and from start to finish, it didn't take too long.
This is a totally easy sewing project and it's easy to do the whole thing in one day. Hope someone enjoys it!
Oh, and if you're wondering why we use cloth napkins, well for one reason they feel better, and for another reason, if you buy paper napkins or paper towels for this, you're buying something to wipe your face with and throw away. Essentially, you're buying your trash. (You're also buying stuff to throw away when you buy garbage bags, but I haven't figured out a way around this one yet.) With the cloth napkins, we can usually use them for more than one meal (we really don't use a napkin most of the time at breakfast except to sit in our laps) and they're reusable until they fall apart. Since I wash the napkins with the rest of the kitchen towels, assuming I have enough napkins, I'm not doing any extra laundry so I'm saving money over the long run. I don't iron our everyday napkins, I just fold them fresh from the dryer and they're ready to go.
posted by Melanie at 9:30 AM
![]()


8 Comments:
I'm a big fan of the cloth napkin - that's all we ever had growing up, as my dad was in the business and our house was full of ends and discontinueds. It freaks out my MIL a bit - she's loath to "use something so nice to wipe a face", and always looks for the paper ones.
I need to do this. I wanted to get away from the waste of paper napkins, but my husband was horrified by the idea of using a cloth napkin more than once. If I just made enough that he could have a fresh one every night, we'd both be happy.
Thanks for the tutorial.
That is one beautiful sewing machine!! I have a more modern singer, I might have a go at a napkin to build my confidence up!
What a great idea! I now know what to do with all my stash fabric taking up space, and who can't use cloth to save on pennies? Thanks for the idea.
We used cloth napkins when I was growing up -- I don't know why I quit when I got out on my own. This is a great, easy little tutorial. And I actually have some of that same bumblebee fabric! Next time I dig out my machine, I just might have to try this myself.
Ah, Singer memories from Home Ec class.
Your picture reminded me of a safety concern: I always shut my fur babies out of my sewing studio when I am using the rotary cutter. I fear they will become fascinated, jump up and bat at the cutter, thus cutting a paw off. (Yes, the rotary cutters are that sharp.)
We only use cloth napkins and I've never been sorry about it. I haven't made any, but this is inspiring! If only stitch witchery would work on a napkin... I'm a professional with that stuff. :)
Thanks for this detailed tutorial! I haven't sewn since high school and this looks like something I could do to get back into it (when I want to take a break from knitting).
We always used cloth napkins when I was a kid and I have mostly used them since. I've collected an odd bunch over the years. I rarely try to set out all matching ones and have a varied collection of napkin rings as well so the napkins can be identified and reused. When my kids come to visit, everyone has their own napkin ring. I'm sure my friends think it's quaint but it makes sense to me to use cloth napkins.
Post a Comment
<< Home