Sewing!
I’ve been doing a little sewing in the afternoons and yesterday I finished a few projects! First up are five pairs of shoe bags for travel.
Shoe bags are a super easy project and since they don’t really take much wear, you don’t have to line them or make them heavy duty. Their whole purpose is to protect the things in your suitcase from your shoes (and vice versa), so you can use just about any fabric. I used quilting cottons, and with the exception of Mickael’s fabric, they were from stash. I didn’t use an official pattern for this. I came up with measurements for mine and Mickael’s bags by measuring actual shoes (mine will hold one running shoe per bag, or a complete pair of ballet flats, Mickael doesn’t usually wear ballet flats, so his fit one shoe per bag). When I was cutting fabric for Caleb’s bags, I made them as close to Mickael’s size as I could (I didn’t have quite as much of those fabrics). His feet are bigger than mine and since shoe bags last forever, I’d like them to be usable for a long time. As far as the sewing, I didn’t use a specific pattern or tutorial, I just winged it (drawstring bags are pretty easy). I used shoestrings for the drawstrings (except for one pair with ribbons, but they had lemons on them).
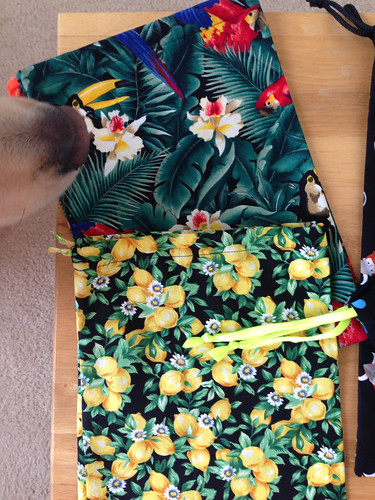 These are my bags, lemons (obviously) and tropical birds. They were having their final inspection by The Nose. Fun note: the bird fabric was directional but if the birds were right side up, the orchids were upside down. Daddy raises orchids so after growing up around them, I notice things like this. (I don’t raise orchids. I kill orchids. I wonder if that’s a marketable skill? Orchid Assassin!) Oh, and I went with right side up birds. Sorry orchids!
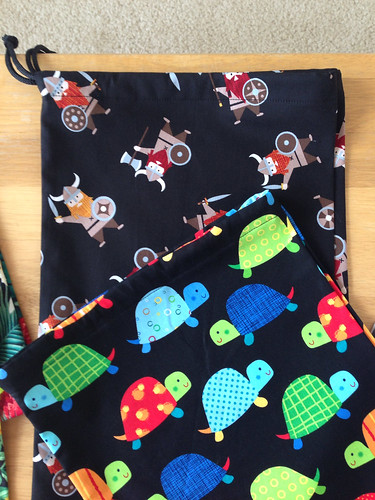 Caleb has turtles and Vikings. I’m pretty sure Ragnar has a pair of the Viking ones. You don’t want your shoes getting scuffed as you pack up to go raiding England.
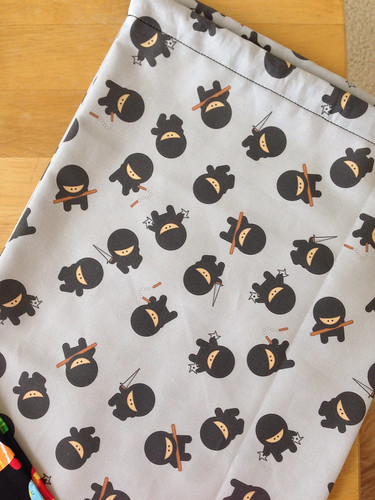 Mickael has ninjas! I ordered this fabric from Spoonflower back when I got the Sherlock fabric. Mickael has two more pairs of shoe bags waiting to be made, but they need a different thread color so I’ll be doing them later. (I used black thread on these first five pairs of bags.) Just thought I’d mention that Mickael will be getting more bags, seeing as he travels way more than Caleb and I do.
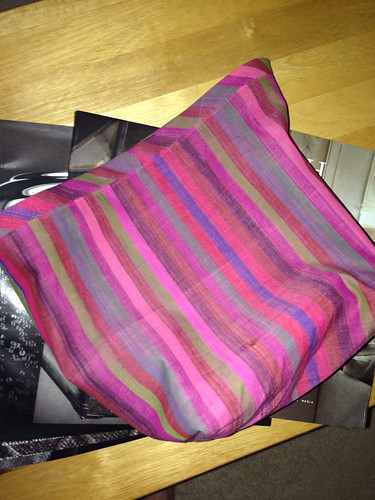 After I finished the shoe bags yesterday, I cut fabric for another bag, and then I actually got it all finished (except drawstrings) last night! (Please notice that I’m using the Restoration Hardware Catalog Collection as a background to the bag. I figure if Restoration Hardware is going to UPS their catalogs to people who spent $4.00 in their store three years ago, then I’ll use them. If we get a wasp or a fly in the house this summer, I fully plan on rolling one of these up and bashing it over the head. I’m not going to let these bad boys go to waste!) This is from the Sock Sack in Three Sizes pattern. It’s meant for knitting two socks at once (which I don’t do), but I thought I could keep yarn on one side and the project itself on the other. The three sizes are Small for socks, Medium for shawls, and Large for sweaters.
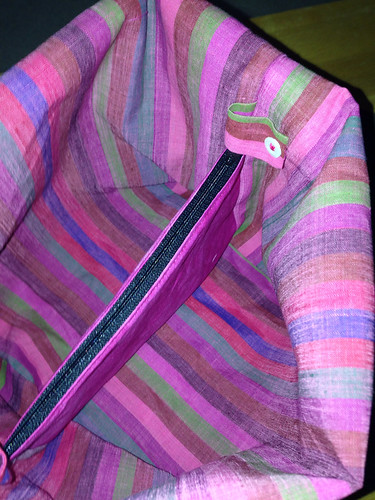 I made the medium size which should be perfect for a shawl. I love the zipper pouch as the center divider. This bag also has yarn guides (the little tabs with buttons) to keep your yarn from getting wonky in the bag. The yarn guides snap closed, I just used a button on the back side of the tab snap to reinforce it. The casing at the top of the bag (where the drawstrings would be if I had any) isn’t supposed to be on the bias, but I wanted to have the stripes on the casing run a different direction than the body of the bag, and after mis-cutting one piece, I didn’t have enough fabric left to do the casing stripes perpendicular to the body stripes, but I could do them on the bias. So I did. The directions on this pattern are really well written, with lots of pictures. Once I saw how the bag went together and how the center divider worked, I understood it, and the actual construction was pretty easy to do. The size is perfect and I’m really happy with the finished bag. It doesn’t have a wrist loop (you could use the drawstrings), but that’s easy to add. I will definitely be making more of these bags!
Shoe bags are a super easy project and since they don’t really take much wear, you don’t have to line them or make them heavy duty. Their whole purpose is to protect the things in your suitcase from your shoes (and vice versa), so you can use just about any fabric. I used quilting cottons, and with the exception of Mickael’s fabric, they were from stash. I didn’t use an official pattern for this. I came up with measurements for mine and Mickael’s bags by measuring actual shoes (mine will hold one running shoe per bag, or a complete pair of ballet flats, Mickael doesn’t usually wear ballet flats, so his fit one shoe per bag). When I was cutting fabric for Caleb’s bags, I made them as close to Mickael’s size as I could (I didn’t have quite as much of those fabrics). His feet are bigger than mine and since shoe bags last forever, I’d like them to be usable for a long time. As far as the sewing, I didn’t use a specific pattern or tutorial, I just winged it (drawstring bags are pretty easy). I used shoestrings for the drawstrings (except for one pair with ribbons, but they had lemons on them).
posted by Melanie at 8:26 AM
![]()


0 Comments:
Post a Comment
<< Home