<body><script type="text/javascript"> function setAttributeOnload(object, attribute, val) { if(window.addEventListener) { window.addEventListener('load', function(){ object[attribute] = val; }, false); } else { window.attachEvent('onload', function(){ object[attribute] = val; }); } } </script> <div id="navbar-iframe-container"></div> <script type="text/javascript" src="https://apis.google.com/js/platform.js"></script> <script type="text/javascript"> gapi.load("gapi.iframes:gapi.iframes.style.bubble", function() { if (gapi.iframes && gapi.iframes.getContext) { gapi.iframes.getContext().openChild({ url: 'https://www.blogger.com/navbar.g?targetBlogID\x3d10582443\x26blogName\x3dPink+Lemon+Twist\x26publishMode\x3dPUBLISH_MODE_BLOGSPOT\x26navbarType\x3dBLUE\x26layoutType\x3dCLASSIC\x26searchRoot\x3dhttps://pinklemontwist.blogspot.com/search\x26blogLocale\x3den\x26v\x3d2\x26homepageUrl\x3dhttp://pinklemontwist.blogspot.com/\x26vt\x3d4292445769315597913', where: document.getElementById("navbar-iframe-container"), id: "navbar-iframe" }); } }); </script>

Tuesday, June 17, 2014

The Project, Part 1

image 
Today we’re going to take a little detour from knitting.  I’ve started working on The Project, and I’m going to drag the blog along for the ride.  (Because, hey, it’s my blog, and you’re here, so come on!  This will be fun!)  I’m not going to fully explain The Project at this point, it will be made more clear as we go along, with the final reveal sometime this fall!

The first part of The Project is a skirt.  For reasons that will be clear later, the skirt needed to be full and fluffy so it doesn’t constrict my movements.  My initial plan was for a tutu. (The Project isn’t really based in reality.  At all.)  I found some tutu tutorials - say that 5 times fast!  As I was thinking though, I wasn’t quite sure that a tutu was 100% right.  Don’t get me wrong, I think a tutu is the answer to many of life’s problems, but I wasn’t sure it was quite right for The Project.

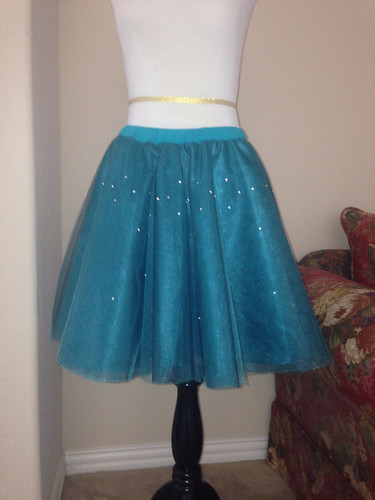
Then I found this tutorial, and this one, and I knew - I didn’t want a tutu, I wanted a tulle circle skirt! I also found this shop over at Etsy (aren’t they dreamy?) and I briefly thought of a doing a full length skirt, but it won’t work for The Project.  ( I hereby solemnly swear that as I am a Pink Lemon with a sewing machine, a loose grip on reality, and a deep love of all things fanciful, fluffy, sparkly, and impractical with a side of fairy tale, I will put serious thought into the possibility of making a full length tulle skirt for the purposes of holidays, birthdays, and the occasional grocery shopping trip, at some point in the future.)  What I did take away from the previously linked Etsy shop though is the idea of layering the colors of tulle.  I love how it adds dimension and drama to the overall skirt.

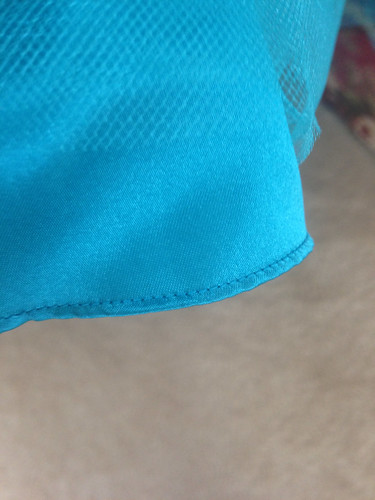
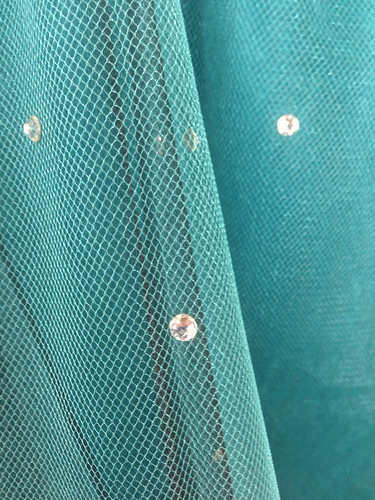
So armed with my game plan, I got out the tape measure and drafted my pattern.  Then I hit Hobby Lobby, who thoughtfully put all their tulle on sale last week.  I got turquoise sparkle tulle, black sparkle tulle and turquoise satin for the lining.  I used the lower edge of a tank top for the waistband casing, along with some non roll elastic. Also, I picked up 120 flat back Swarovski crystals to make the skirt sparkly.  The total cost of my skirt was $25, with about half of that in crystals.
image
I made the skirt following the tutorials (or following the tutorials as I remembered them - I read them ahead of time and then just winged it).  The thing that took the longest was hemming the satin lining, but I used my rolled hem foot and it really just took time and patience since the outer circumference of this skirt is approximately 46 miles - it wasn’t difficult.  I cut five layers of the turquoise sparkle tulle and two layers of the black sparkle tulle, then I decided what order to put the colors in.  I settled on (from the bottom up) lining, four layers of turquoise, two layers of black, and one layer of turquoise on top.  Before I sewed things together, the top layer needed to be embellished with the crystals.  I glued them into place using this glue and let them dry (being careful not to let them glue to the cardboard I was using to work on), then I flipped the tulle over and put a drop of glue on the backside of each crystal.  I did this to “lock” the crystals onto the tulle, since tulle isn’t the most solid material.  I don’t want any sparkles falling off!  Unfortunately, Max woke up during this second gluing and immediately sensed that I needed his help and jumped up to be part of the tulle, crystal, and glue party I was having.  Mickael quickly removed Max to the bedroom and Caleb helped me carry the tulle out of the kitchen to the guest room where we could shut the doors and it could dry in peace.
image
The actual sewing wasn’t difficult and by the end of the day, I had a tulle skirt!  I cut the elastic so it would sit below my true waist because that’s where I like my skirts to hit, so the way you see it on Fifi above, is how it sits on me.

Obviously, there will be more to The Project, but that’s another post, for another day…

Oh, and if you’ve suddenly been overcome with a deep and burning desire to make yourself a full length tulle skirt, I found this place that sells 40 yard bolts of tulle for $11!

Labels: , ,

0 Comments:

Post a Comment

<< Home