Camp Loopy 2015, Project 2
I’ve gotten some more done on my Camp Loopy project. Actually, I’ve gotten a lot done, but I still haven’t started sewing it together! Four of my fabrics are based on Venetian glass designs (I think they’re called Paperweights and Millefiori), and in order to use the required yardage I needed to piece them together to make a new “fabric” to cut out some of the bag pieces. I played around with the numbers some and decided to make my squares two inches finished (2.5 inches cut size) and pieced them together into two rectangles for the outside of my bag. (I had figured out the sizes of the rectangles beforehand so I could cut the bag pieces out.)
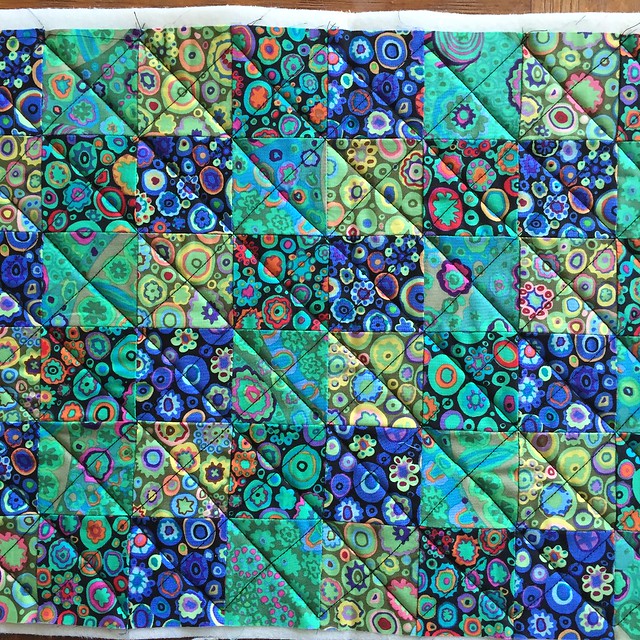
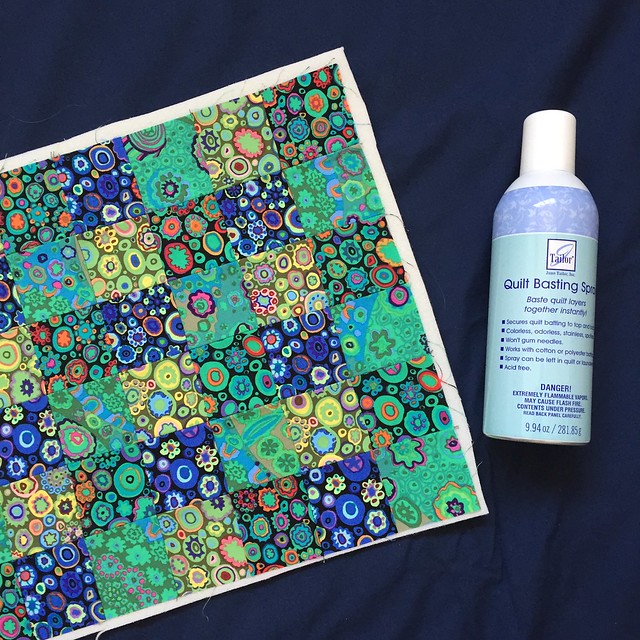 Once I had the pieced panels, I had to join them to the Soft and Stable (this is my first time using it, but it’s very similar to the batting used in Vera Bradley bags), and then quilt them. The Soft and Stable doesn’t have to be quilted, you can just catch it in the seams, but I wanted the additional texture the quilting would give me, and I knew it would blur the edges of the squares a little more too. I used basting spray to attach the pieced panels to the Soft and Stable and I was very happy with how well it worked! Particularly since I wasn’t using a backing (the bag will be lined later), I didn’t want to mess with hand basting or pin basting. The spray basting worked wonderfully for this and I didn’t have any trouble with stickiness on my needle or on the rotary cutter later. I just quilted a diagonal grid, using the corners of the pieced squares as guides. It’s not perfect, but you really can’t tell because the fabrics are so busy anyway.
 Once I got both panels quilted, it was time to sit down and start cutting things out. I started out by making myself a checklist of what I needed to cut from each fabric, and I think that may have saved me a lot of time during the actual cutting. I’ve now gotten everything cut except a couple pieces of fusible interfacing, since I ran out (mine was 20 inches wide instead of 22 inches wide). I’ll be swinging by the store later this morning to get some more so I can get those last pieces. Hopefully today or tomorrow I’ll get it all fused to the lining pieces and then I’ll be ready to start sewing!
Labels: Camp Loopy 2015, sewing
posted by Melanie at 8:29 AM
![]()


1 Comments:
Heh, your three recent projects are very blue and green! Must be a phase. :)
Lovely stuff, all of it.
Post a Comment
<< Home